My very talented friend and colleague Matt Hart has kindly written a blog post for you where he will share 5 tips for how to harden your Azure resources.
We will be focusing mainly on Azure Web Apps and SQL Databases. All these methods are features of your Azure resources and do not incur additional charges.
1. Have separate logins on your SQL Server
Ever heard the phrase “don’t put all your eggs into one basket”? When setting up your logins for your Azure SQL server and databases don’t just use the one admin login, create multiple logins for each database/application.
By default, an Admin login is created when provisioning an Azure SQL Server. Do not use this login in any application connection strings such as the Umbraco database connection string for a Web App. Instead use the Admin login in SQL Server Management Studio to administrate your SQL Server only.
An admin login lets you view all databases (including the master database) on a server. This could become a major headache if someone obtained those credentials by nefarious means. When setting up the credentials for your Application’s connection strings create separate logins to ensure it can only access the databases it needs and not all the databases on the server.
This can be achieved with a few SQL Commands, you will need Microsoft SQL Server Management Studio run the following code.
Run this SQL command on the Master database table to create a login with a password:
CREATE LOGIN [my-app-login] WITH password='myV3ry$ecurePa55word';Navigate to the SQL Database you want to create a login for and run this SQL on that specific database to create a user paired with the login we just created:
CREATE USER [my-app-user] FROM LOGIN [my-app-login];
EXEC sp_addrolemember 'db_datawriter', 'my-app-user'
EXEC sp_addrolemember 'db_ddladmin', 'my-app-user'
EXEC sp_addrolemember 'db_datareader', 'my-app-user'
The EXEC lines specify the Database level roles that the user has over the database in question. You want to use different roles depending on the requirements of your application. You can more information about database roles here: https://docs.microsoft.com/en-us/sql/relational-databases/security/authentication-access/database-level-roles?view=sql-server-ver15
With this additional login created we can now apply our restricted login (my-app-login) to a connection string for a web app or any other resource. We can then have our admin login stored in a password manager or even Azure Key vault and restrict access based on who is authorised to view it.
You could also try using Azure AD and service principals to authenticate to a database. However, I haven't managed to get this to work with Umbraco yet, but it may work fine with other applications. You can read more about it here: https://docs.microsoft.com/en-us/azure/azure-sql/managed-instance/aad-security-configure-tutorial
2. IP Restrict your Azure SQL Server
When creating a SQL server ensure IP restrictions are in place. By default, Azure SQL Server will block all traffic except for Azure services until you specify an allowed IP address.
Find your SQL Server resource in Azure and then head to Firewalls and virtual networks. Then in the Start IP and End IP put in the IP address you want to allow. Give it a Rule name as well such as Home or Office London. So you and your colleagues can identify who the IP address is at first glance.
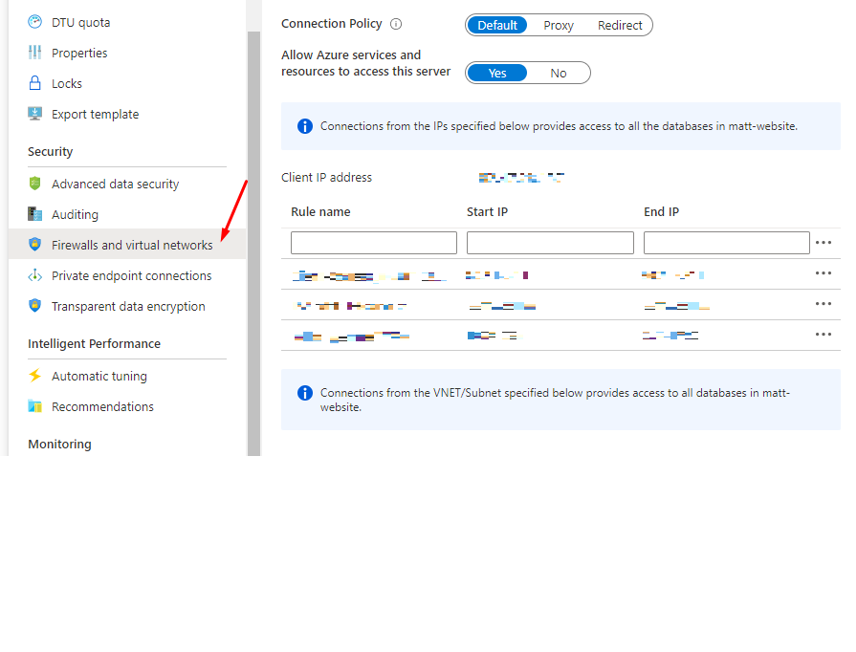
You can also create alerts to monitor and notify you of any changes to the SQL Server such as any firewall changes like the above. This will allow you to be notified if someone changes the firewall settings. To do this search for Monitor in the Azure portal and click Create Alert:
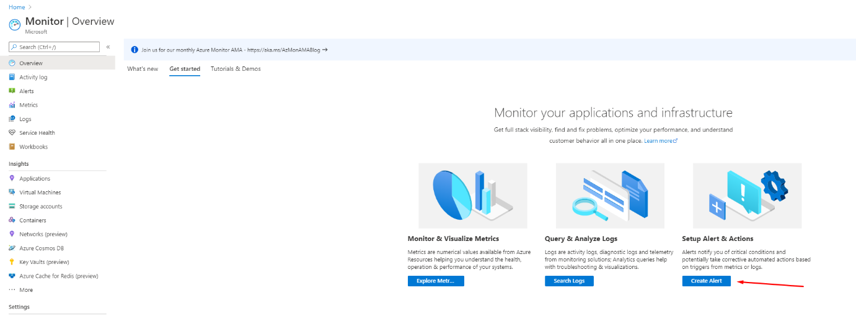
First, we need to pick our resource so click Select resource. We then need to pick our subscription and then filter by resource type, pick SQL Servers as our resource type. Azure should then load in your resource you could target a whole resource group if you wished. However, I want to target my SQL Server specifically:

We now need to specify the condition that will trigger the alert. I want to be notified of all Administrative operations. However, there are additional options if you want to pick something else:
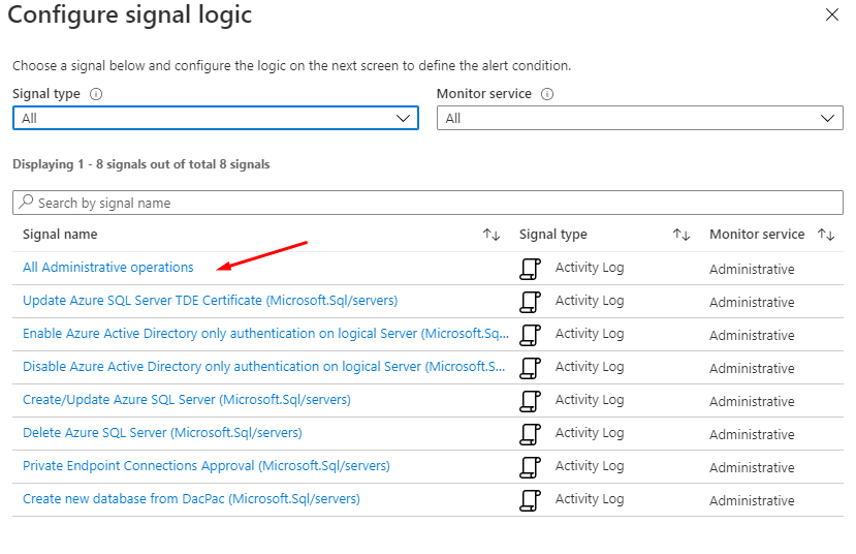
Pick one and click Done.
We now need to create an Action group, give it a name and leave the resource group as the default value. We now need to configure an action that Azure will undertake when the condition above is met. Using the Action Type dropdown we have a few choices. I want to be notified by email so I will pick the Email/SMS message/Push/Voice option.
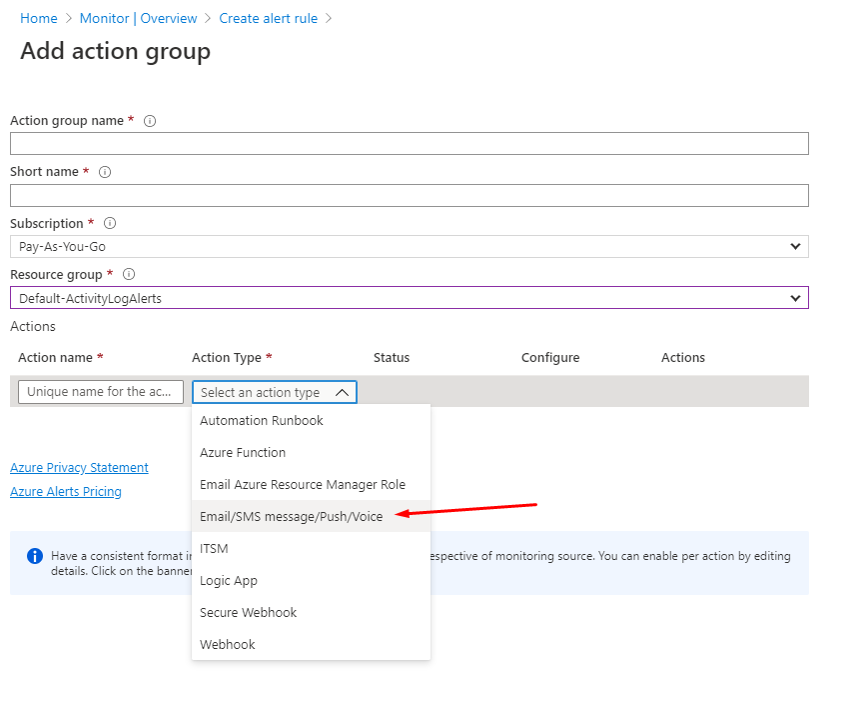
Once you pick the action type another blade will open where you can provide your contact details, click OK once you have entered your email or phone number:
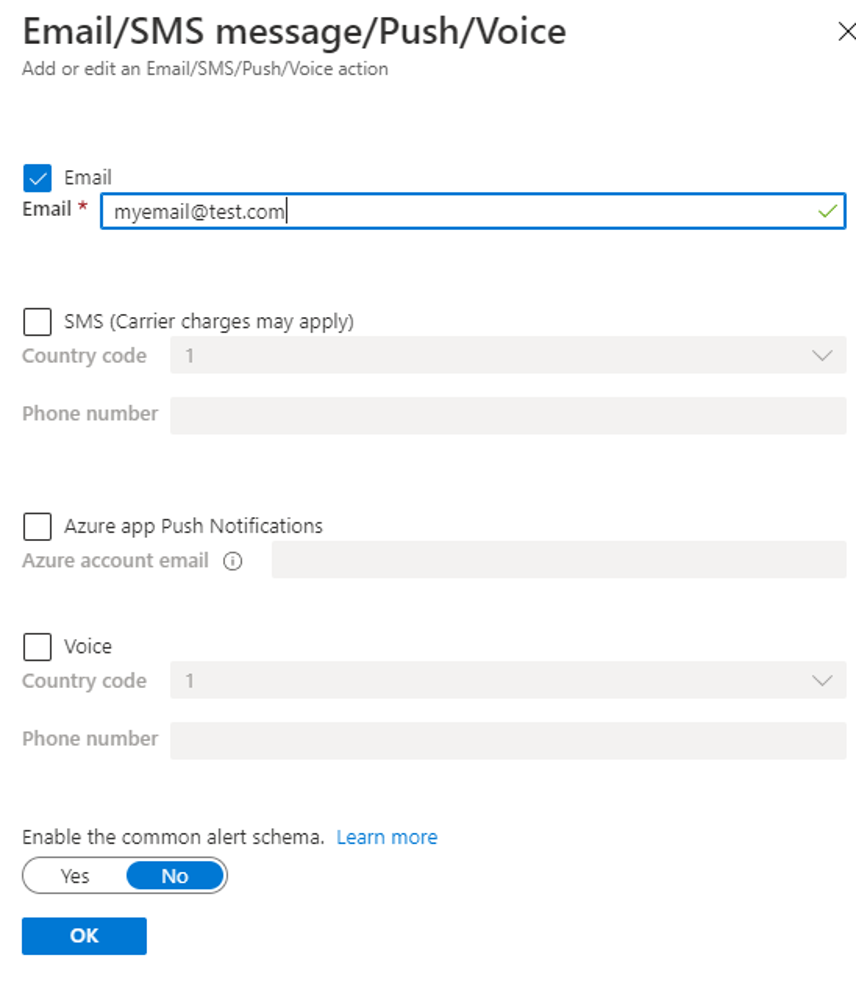
Once you click OK Azure will go and create your Action Group. You will then need to pick it on the action group blade, then click Select:
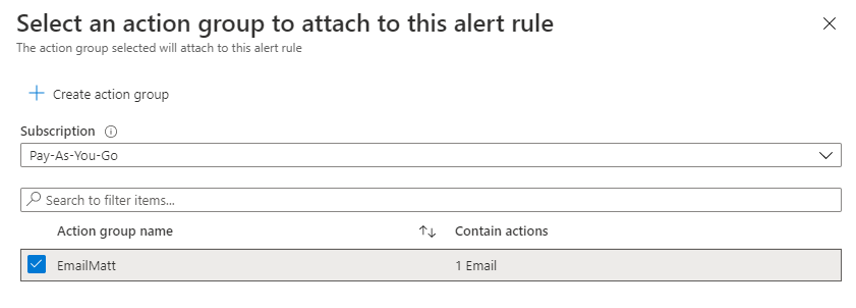
Give your Alert Rule a name and a description if needed, then click Create alert rule:

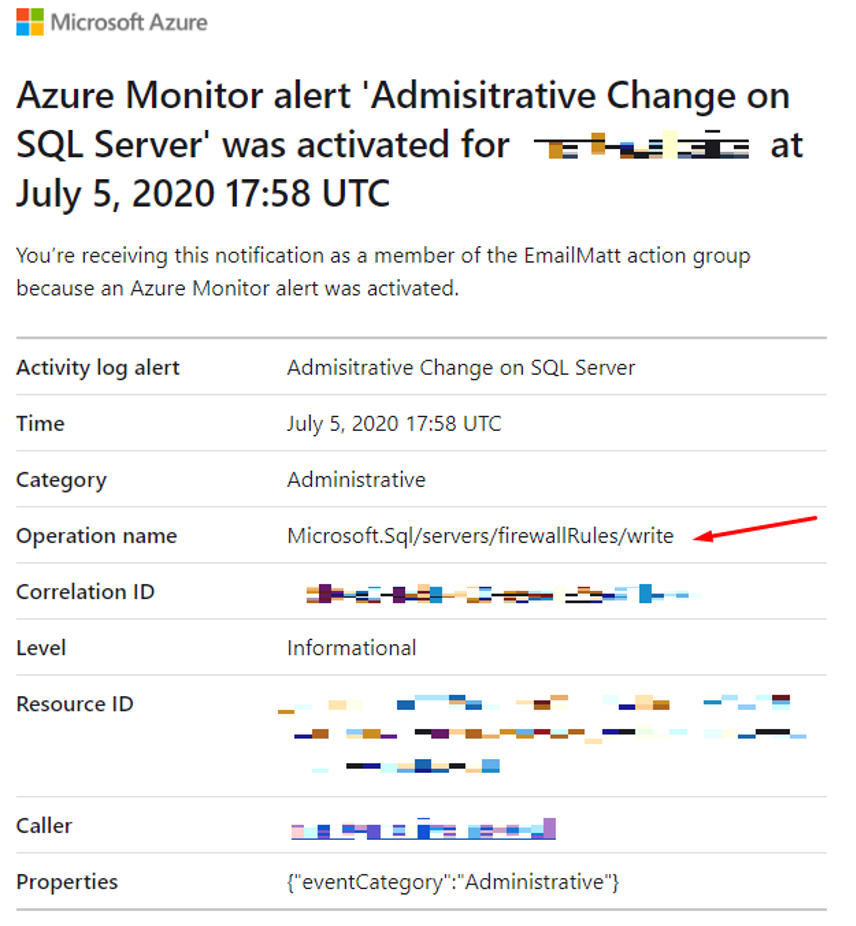
Before testing give Azure 5 minutes to create the alert rule. You should now get an email notification when an Administrative operation is performed on your SQL Server. Below you can see the email I received the operation name tells me a write operation was performed on the firewall rules of my SQL Server:
From looking at the Azure pricing calculator you get “1,000 emails, 1,000 push notifications, 100,000 web hooks and 10 voice calls are included for free per month”.
3. Don’t put your connection string into the Web Config
Yes, that really important file that everyone knows about the Web.Config don’t put your connection string into that file. Instead add it as a Secret App Setting on your Web App. Azure will store the connection string safely and stream the connection string to the Web App environment with Encryption.
You could also put your credentials into separate files with obscure filenames and have the web config reference those files, this may be more applicable for Windows Server VMs. Replace your connectionStrings element with this:
<connectionStrings configSource="config\secret\myconnectionstring.config" />Then create a config file at the path we specified config\secret\myconnectionstring.config and put in your connection string using this structure (this example is for an Umbraco connection string):
<connectionStrings>

    <remove name="umbracoDbDSN"/>

    <add name="umbracoDbDSN" connectionString="theconnectionstring" providerName="System.Data.SqlClient"/>

</connectionStrings>
This will still mean the credentials are stored on the filesystem, but it will prevent our next issue. Committing your credentials into source control!
Both methods save you having the connection string stored directly in git. Which by the way is a terrible thing to do in terms of security! Don't put any confidential credentials in your source control! If you do have credentials in your source control remove them and reset the credentials.
You can also store your credentials as variables within your deployment process with Azure DevOps or Octopus Deploy. However, I recommend using the Secret App Setting Method to have it one place.
4. Disable FTP access on your web App
By default when you create a web app FTP transfer is enabled. This allows you to access the file system of the web app over FTP. The credentials are generated by Azure and stored in the Publish Profile file but ideally its best to switch this off to remove options an attacker may use. It's very easy to download the publish profile file and leave it laying around on your computer. All it takes is someone to find that profile file and login using the credentials.
On your Web App click Configuration > General Settings and set FTP state to Disabled

5. IP Restrict the Web App if you use Cloudflare
This was an additional idea that I thought of after I finished writing https://mattou07.net/posts/six-ways-to-secure-your-umbraco-back-office/. If you are using Cloudflare there is no need to have the Web App publicly accessible as Cloudflare is handling all the traffic. Cloudflare has a page listing all IP address ranges their services use https://www.cloudflare.com/ips/. Simply allowing these IP's on the Web App firewall will allow only Cloudflare to access your Web App Directly. The benefit of this is no one in the world can directly access your Web App and they would have to get past the Cloudflare proxy to identify the Web App name and then the Azure firewall to touch your web app. I have this setup on my blog https://mattou07.net and additionally have my own IP address added so I can access the Web App if I need to.
We can easily achieve this with the Azure CLI and some Powershell. Cloudflare usefully provides their IP ranges as text files making it easier to apply these IP address with scripts. I have a Github repo called Azure Cli Quick Wins. This link will take you to a Powershell script that will obtain the IP ranges and then apply them to the Access Restrictions of your desired Web App: https://github.com/mattou07/azure-cli-quick-wins/blob/master/app-service/firewall/assign-cloudflare-ips.ps1
I will periodically add more useful scripts as I come across long tedious tasks.